Utilizing Deck‑O‑Seal and Waterproofing Membrane Together for Ultimate Security
Pool shells seldom fall short as a result of one remarkable error. More frequently, a handful of little details obtain missed: a joint unclean properly, a membrane cut down too far, a mastic joint left to dry. For many years I have been employed to diagnose why a new waterline ceramic tile is popping, why a travertine coping band is heaving, or why a beautiful quartz aggregate surface has corrosion stains tracking from a solitary joint. In much of those jobs, Deck‑O‑Seal and a proper waterproofing membrane might have avoided the issue, if they had been used together and in the ideal sequence.
This is an overview for building contractors and renovators that currently know just how to fire a covering and established ceramic tile, however want to tighten up the waterproofing details around the pool border. The emphasis is the interaction between elastomeric sealer joints and sheet or fluid waterproofing membrane layers, and exactly how that affects every little thing from waterline ceramic tile to coping stones to cantilevered decks.
Why the joint at the pool side matters so much
When you consider an ended up pool, your eye mosts likely to the glass mosaic ceramic tile, the PebbleTec, maybe the travertine coping. The the very least attractive part is the joint in between the pool structure and the deck or coping. That tiny space rides out all the differential activity between a pneumatically used concrete covering and whatever rests on top of the bond beam.
Concrete reduces and cracks, soil swells, decks proceed their own timetable. The pool bond beam of light relocates in different ways than the deck slab that may be doweled to it, or floating just off of it. If you connect that motion with stiff grout or mortar, something will eventually break. Commonly it is not the cement you discover initially. You see:

- hairline splits in bullnose block bands, with efflorescence tracking from the joint
- white line plaster discoloration right under a leaking coping joint
- loose waterline tile from moisture biking behind the setup bed
Behind a lot of those symptoms is water entering the bond beam of light via a fallen short joint. When water locates a hairline, it will function past the waterline tile, behind the floor tile underlayment, and into the gunite or shotcrete. Cold climates see freeze-thaw spalling, cozy environments see rebar rust and spalled chunks.
A high performance, two-part polyurethane like Deck‑O‑Seal is developed to maintain that joint adaptable and watertight. A waterproofing membrane, properly detailed, guarantees that if a bit of water surpasses the sealer on top, it does not migrate sidewards to create tile debonding or plaster delamination. Used with each other, they make the perimeter far more forgiving.
What Deck‑O‑Seal actually does, and what it does not
Deck O‑Seal is not magic. It is a flexible joint sealant, typically mixed on site as a two-component system, after that put or gunned right into a correctly sized and prepared joint. When utilized correctly between the deck and the swimming pool coping or bond beam of light, it deals with 3 essential stresses.
First, it extends. That is what safeguards a travertine coping band or cantilevered coping when the deck works out slightly far from the covering. If you grout that joint strong, something will certainly break as soon as temperatures swing 30 degrees or the soil gets saturated.
Second, it stands up to consistent dampness and pool chemicals. More affordable mastics obtain fragile or milky after a few seasons of chlorinated splash-out and UV. They begin to split right where you need them to flex.
Third, it safeguards nearby finishes. A well-tooled joint maintains water from resting straight against the underside of dealing stones or tracking behind the waterline ceramic tile. That keeps mortar beds and thinset drier and even more stable.
There are likewise clear limitations. Deck‑O‑Seal is not a replacement for a waterproofing membrane layer on the upright face of the bond light beam. It should not be utilized to bond coping rocks, repair skimmer throats, or patch architectural fractures in the covering. It is one component of a system, and it does best when the products around it prepare to do their very own jobs.
The duty of waterproofing membrane layers at the pool perimeter
Modern ceramic tile and plaster settings up rely heavily on membranes. The idea is to produce a regulated aircraft where fluid water stops, then make the system so any kind of incidental dampness that does creep through can drain or evaporate without damaging the structure.
At the perimeter, a membrane layer normally does 3 work at the same time:
It isolates the waterline floor tile and setting bed from incidental deck or coping wetness. For instance, a generous sprinkle of muriatic acid laundry during a coping clean-up can move into a vulnerable setting bed and damages thinset if the membrane layer is lacking or reduce as well far.
It shields the swimming pool bond beam of light from saturation. Constantly damp gunite is a recipe for rusting rebar and spalling. A membrane layer on the upright face, linked right into a straight one behind the floor tile, is your finest insurance.
It offers a consistent substratum for finishes like Hydrazzo, Ruby Brite, or subjected pebble coating. These specialized glues do far much better on a stable, evenly soaking up base than on a jumble of bare gunite, hydraulic concrete patches, and old thinset.
Used appropriately, a waterproofing membrane lowers the vapor and fluid loads on both the structure and the finishes. When you connect that membrane layer right into a flexible Deck‑O‑Seal joint, you substantially reduce the threat of moisture reaching areas where it can freeze, rust, or debond tile.
How Deck‑O‑Seal and membrane connect at the vital joint
The place where people enter into problem is the user interface of the sealer joint and the membrane. I see two repeating errors.
One is running the membrane layer right up into the joint and after that bonding Deck‑O‑Seal straight to it. Extremely few sheet or fluid membrane layers are created to hold a lasting bond with elastomeric joint sealants where there is regular movement and water direct exposure. Over time, the sealant peels off the membrane, the bond stops working, and water bypasses both.
The various other is reducing the membrane too low on the upright face of the bond beam and afterwards bedding the coping or tile directly over raw concrete. In that instance, hydrostatic pressure from the behind or duplicated wetting from the top can push moisture right into the setup beds and behind the waterline floor tile. You still have a good looking mastic joint, however water is relocating underneath it.
The trick is to think of the joint as a movement break that you secure on three sides, not as a single line of defense. The waterproofing membrane secures the faces. The Deck‑O‑Seal loads the top of the space and bonds just to secure, ready concrete or stonework, not soft membranes.
When I layout that user interface, I desire:
- the membrane layer to finish simply timid of the joint, leaving a clean strip of permeable concrete for sealant adhesion
- an appropriate backer pole to control the depth and form of the Deck‑O‑Seal
- clean, dry, profiled substrate that has actually not been contaminated by type release representatives, over-spray, or laitance
That detail appears easy, however the team on site requires to understand why it matters or it will get rushed.
A practical sequence that works in the field
On a remodelling where we are doing waterline ceramic tile, dealing replacement, and interior resurfacing, one of the most dependable series typically looks like this:
Structural job and pool shell preparation. Any kind of shotcrete repair work, gunite resurfacing, or crack sewing comes first. This consists of skimmer throat fixing with hydraulic concrete, reconstructing the swimming pool bond beam of light where coping has actually stopped working, and handling any type of serious plaster delamination by reducing to solid material. Substratum scarification is essential right here, whether by mechanical grinding or water blasting, so the brand-new layers have tooth.
Pressure test and pipes corrections. Before you hide anything, run a proper pool plumbing pressure test. It is outstanding the number of weeping joints at return installations or behind pool light particular niches obtain discovered at this phase. Repairing them now defeats going after wet areas later.
Membrane and floor tile underlayment. When the shell is structurally audio and roughened, use your picked waterproofing membrane on the bond beam of light and floor tile band. Several installers integrate a fluid membrane with a cementitious tile underlayment to tweak flatness before setting up waterline tile or glass mosaic ceramic tile. The key is to bring the membrane high enough behind the future coping or cantilevered deck, yet stop short of the actual motion joint, leaving a slim band of bare concrete for future sealant adhesion.
Tile and dealing installment. Set the waterline tile on the membrane and underlayment, with mindful interest to insurance coverage and positioning. Over, install the travertine coping, bullnose brick, or poured cantilevered coping. Leave a constant joint size at the interface with the deck or shell edge where Deck‑O‑Seal will certainly go. Avoid smearing thinset or mortar right into that joint gap.
Interior coating. After tile and coping cure, wage plaster, quartz accumulation coating, pebble, PebbleTec, Hydrazzo, or Diamond Brite. Protect the incomplete joint from plaster overrun. If a little enters the space, eliminate it easily while the material is still environment-friendly. An acid etching action or light muriatic acid laundry is common to subject quartz or pebble accumulation, but keep acid far from the bare concrete that will obtain the sealant.
Joint preparation and Deck‑O‑Seal positioning. Just when everything is cured and dry do you clean up the joint, insert backer pole, and install Deck‑O‑Seal. Adhere to the manufacturer's joint width-to-depth proportions. Device the product to drop water far from the joint, not form a flat trough.
The staffs that have a hard time normally press these steps, or they flip the order and attempt to mask and pour mastic before plaster. That might look efficient, yet a painter's tape side is not a replacement for actual bond to a profiled, clean joint face.
Field notes on specific details and trouble areas
There are particular areas around the pool where the mix of membrane layer and Deck‑O‑Seal is particularly important.
Around skimmers and pool light niches
Skimmer throat repair service is a common headache in older swimming pools. Hairline splits in the throat can attract water right into the bond beam of light and behind the floor tile. The appropriate order is to patch the throat with hydraulic cement or a suitable fixing mortar, grind smooth, apply a neighborhood waterproofing membrane layer that links into the main bond light beam membrane layer, then rebuild the tile and plaster quits. What you do not desire is a chunk of sealant attempting to waterproof a structural split on its own.
Pool light particular niches are comparable. The metal or plastic specific niche need to be mechanically audio and appropriately sealed at its conduit entrances. The waterproofing membrane layer around the specific niche need to end cleanly, without bridging versatile plastic to rigid concrete. Deck‑O‑Seal does not belong inside the niche as a spot; its area, if used nearby, is at the perimeter joint where deck or dealing satisfies the shell.
Cantilevered coping and thick decks
Cantilevered coping, typically where the deck concrete is put right over the top of the swimming pool edge, produces a misleading obstacle. The cantilever tends to transfer deck motion right into the bond beam unless you separate both carefully.
In these instances, a membrane on the upright face of the light beam and on the leading surface area under the cantilever is very crucial. You are trying to quit deck wetness from taking a trip commercial splash pad builder into the shell. At the underside of the cantilever, you still want a true movement joint, often backed with foam and secured with an elastomeric like Deck‑O‑Seal. The membrane must be terminated so the sealer only touches steady, stiff surface areas, not soft seclusion foam or membrane edges.
The usual failing I see is a deck service provider attempting to float their very own spot of mastic, making use of whatever sealer they brought for the expansion joints in the piece, smearing it over membrane and foam alike. It looks sealed, yet the bond is weak and the joint falls short early.
Coping stones and all-natural travertine
Travertine coping absorbs water conveniently. Without a proper membrane and joint information, moisture will wick from the deck or from behind the waterline ceramic tile into the stone. In freeze climates that implies spalling. In any kind of environment you can see discoloration and salt deposits.
With natural rock, I such as to see the waterproofing membrane layer fully covering the top of the bond beam, prolonging under the full size of the coping, yet again, not into the real expansion joint that will certainly obtain Deck‑O‑Seal. The joint itself requires hostile cleansing prior to sealer. Travertine dirt, thinset crumbs, and even sealer overspray can minimize adhesion.
One narrative that sticks with me: a swimming pool with a beautiful cream travertine band, white line plaster, and subjected pebble surface. After two winter seasons, the proprietor complained regarding dark lines appearing in the travertine right over the joint. We opened a section and located a thin strip of membrane layer folded up right into the joint, with the deck mastic bonded mainly to that soft flap. Water had the ability to slip beneath it and stay trapped against the underside of the stone. As soon as we re-cut the joint, properly terminated the membrane layer, and re-installed Deck‑O‑Seal on clean concrete faces, the issue quit. The staining gradually discolored over a couple of years of use.
Dealing with existing damages when renovating
Many work are not clean slates. On a restoration you might face hollow waterline floor tile, failing subjected pebble surface, and multiple generations of old mastic piled in the joint. In those situations, you have to make a decision just how much back to go.
If the bond beam of light is currently endangered from years of leak, a partial demonstration and gunite resurfacing could be called for. That can feel radical, yet it gives you a known, solid substratum for a new membrane layer and floor tile underlayment. It additionally lets you re-establish appropriate joint geometry, which may have been lost under layers of patching.
Plaster delamination, specifically where a white line plaster band has actually divided from the structural shell at the ceramic tile line, points to persistent dampness behind the surface. You can eliminate the loosened product, scarify the exposed shell, mount a membrane layer in the band, and link it right into the waterline tile underlayment. That provides the new indoor coating a better opportunity at long-term adhesion.
Old mastic joints need to be fully removed if you desire Deck‑O‑Seal to perform. Scuffing the surface is not enough. I have actually seen brand-new sealer fail within a year due to the fact that it was drifting on a crust of breakable, oxidized product beneath. Mechanical elimination to appear concrete, followed by vacuuming and a wipe-down with the cleaner accepted by the sealer supplier, is the best way.
Getting the details right: a short joint prep checklist
Even experienced crews occasionally scam joint preparation due to the fact that it feels like "just caulking." When you are trying to incorporate Deck‑O‑Seal with a membrane-based system, a straightforward, constant checklist helps.
Confirm membrane layer termination. Validate that no membrane layer runs into the joint location. If it does, cut it back carefully to expose tidy, audio concrete on both sides.
Clean and completely dry the joint. Get rid of old mastic, mortar, and debris to the specified deepness. Joint encounters should be completely dry and devoid of dirt, oils, and launch representatives. Vacuum cleaner as opposed to blowing dirt right into the pool.
Size and place backer pole. Use a closed-cell backer pole of the correct diameter so it sits well and establishes an appropriate depth for the sealant. Do not penetrate or stretch it thin.
Prime if called for. Some substratums or difficult conditions ask for a guide accepted for usage with Deck‑O‑Seal. Comply with the producer's home window between priming and sealant placement.
Install and tool sealer. Mix Deck‑O‑Seal thoroughly, place it to a little overfill the joint, then device it to press against the sides and develop a smooth, slightly crowned surface that loses water.
Treating these five points as non‑negotiable, as opposed to suggestions, is usually the distinction between a joint that looks helpful for one period and one that is still operating 10 years later.
Grout color, appearances, and proprietor expectations
Homeowners often tend to discover shade greater than information like joint geometry. They contrast the mastic joint to the grout between their waterline ceramic tile or glass mosaic floor tile and ask why they do not match completely. Early in my job I tried to please every person by going after cement shade matching for each Deck‑O‑Seal joint. The reality is, illumination, water representation, and product aging all affect perceived color.
What matters much more is that the joint performs. I have learned to discuss that the movement joint sealer is a useful aspect that additionally looks neat, not an attractive grout. If the customer insists on a tighter suit, I show them cured examples at the swimming pool under genuine illumination instead of relying upon catalog chips. It is also wise to describe that ultraviolet exposure, chemical get in touch with, and also routine muriatic acid clean of floor tile can influence color over the years.
By setup assumptions up front, you can focus on integrating the membrane layer and sealer properly, instead of being pressed toward compromises that look great on the first day but shorten the life of the system.
When to rethink the entire side assembly
Sometimes integrating a membrane and Deck‑O‑Seal is inadequate if the underlying layout is flawed. For example, a pool where the deck is monolithically linked right into the bond beam with hefty rebar and no expansion joint is asking a flexible sealant to take in structural movement it was never ever made for. Likewise, a bond beam put too thin, or with rebar hotel pool construction running also near the coping surface, is vulnerable to cracking regardless of exactly how well you seal the joint.
Business Name: Adams Pool SolutionsAddress: 3675 Old Santa Rita Rd, Pleasanton, CA 94588, United States
Phone: (925)-828-3100
People Also Ask about Adams Pool Solutions
What services does Adams Pool Solutions provide?
Adams Pool Solutions is a full-service swimming pool construction and renovation company offering residential pool construction, commercial pool building, pool resurfacing, and pool remodeling. Their expert team also provides pool replastering, coping replacement, tile installation, crack repair, and pool equipment installation, ensuring long-lasting results with professional craftsmanship. Learn more at https://adamspools.com/.
Where does Adams Pool Solutions operate?
Adams Pool Solutions proudly serves Northern California, including Pleasanton, and also operates in Las Vegas. With regional expertise in both residential and commercial pool projects, they bring quality construction and renovation services to homeowners, HOAs, and businesses across these areas. Find them on Google Maps.
Does Adams Pool Solutions handle commercial pool projects?
Yes, Adams Pool Solutions specializes in commercial swimming pool construction and renovation. Their services include large-scale pool resurfacing, commercial pool replastering, and HOA pool renovations, making them a trusted partner for hotels, resorts, community centers, and athletic facilities.
Why choose Adams Pool Solutions for pool renovation?
Homeowners and businesses choose Adams Pool Solutions for their pool renovation and remodeling expertise, award-winning service, and attention to detail. Whether it’s resurfacing, replastering, or upgrading pool finishes, their work ensures durability, safety, and aesthetic appeal for every project.
What awards has Adams Pool Solutions received?
Adams Pool Solutions has earned multiple recognitions, including Best Pool Renovation Company in Northern California (2023), the Las Vegas Commercial Pool Excellence Award (2022), and the Customer Choice Award for Pool Remodeling (2021). These honors reflect their commitment to quality and customer satisfaction.
What are the benefits of working with Adams Pool Solutions?
Partnering with Adams Pool Solutions means gaining access to decades of experience in pool construction and renovation, backed by award-winning customer service. Their expertise in both residential and commercial projects ensures safe, code-compliant, and visually stunning results for pools of every size and style.
How can I contact Adams Pool Solutions?
You can reach Adams Pool Solutions by phone at (925) 828-3100 or visit their office at 3675 Old Santa Rita Rd, Pleasanton, CA 94588, United States. Their business hours are Monday to Friday, 8 AM to 4 PM. More details are available at https://adamspools.com/.
Is Adams Pool Solutions active on social media?
Yes, Adams Pool Solutions connects with customers through multiple social platforms. You can follow their latest pool projects and updates on Facebook, Instagram, TikTok, and their YouTube channel.
If you are currently opening the perimeter for a significant renovation, it can be worth taking another look at the whole side assembly: just how the deck satisfies the covering, what isolation products are utilized, and just how moisture actions through and under the pieces. Rebuilding with a true expansion joint, a qualified waterproofing membrane system, and correctly detailed Deck‑O‑Seal can include years to the life of the waterline tile, coping, and indoor finish.
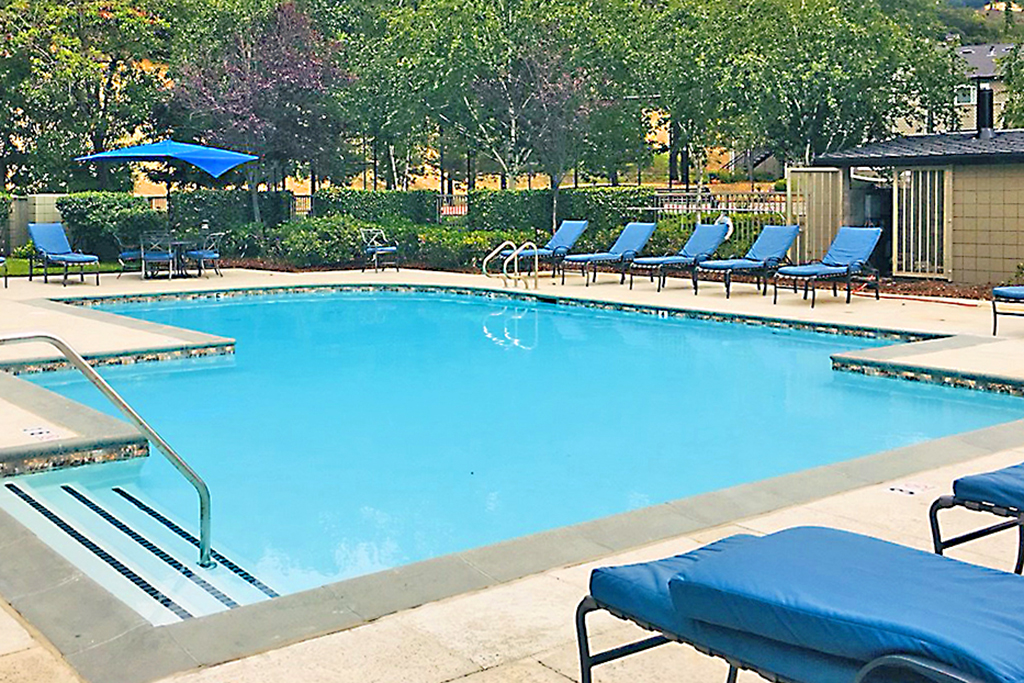
Our commercial pool construction work in Berkeley Hills reflects Adams Pools’ commitment to design excellence.
Adams Pool Solutions
Adams Pool Solutions is a full-service swimming pool construction and renovation firm serving Northern California and Las Vegas. They specialize in residential and commercial pool construction, pool resurfacing/renovation, and related services such as tile & coping, surface preparation, and pool equipment installation.
(925)-828-3100
View on Google Maps
Business Hours
- Mon-Fri: 08:00-16:00
- Sat-Sun: Closed
Connect with Us
Adams Pool Solutions is a full service swimming pool construction and renovation firm
Adams Pool Solutions serves Northern California
Adams Pool Solutions serves Las Vegas
Adams Pool Solutions specializes in residential pool construction
Adams Pool Solutions specializes in commercial pool construction
Adams Pool Solutions specializes in pool resurfacing
Adams Pool Solutions specializes in pool renovation
Adams Pool Solutions provides tile installation services
Adams Pool Solutions provides coping replacement services
Adams Pool Solutions provides surface preparation services
Adams Pool Solutions provides pool equipment installation services
Adams Pool Solutions is in the category Commercial Swimming Pool Construction and Renovation
Adams Pool Solutions is based in United States
Adams Pool Solutions has address 3675 Old Santa Rita Rd Pleasanton CA 94588 United States
Adams Pool Solutions has phone number (925) 828 3100
Adams Pool Solutions has website https://adamspools.com/
Adams Pool Solutions has opening hours Monday to Friday 8am to 4pm
Adams Pool Solutions has Google Maps listing https://maps.app.goo.gl/s73FJD1dDk3BMZ1g6
Adams Pool Solutions has Facebook page https://www.facebook.com/adamspools/
Adams Pool Solutions has TikTok profile https://www.tiktok.com/@adams_pool_solutions?lang=en
Adams Pool Solutions has Instagram profile https://www.instagram.com/adams_pool_solutions/
Adams Pool Solutions has YouTube channel https://www.youtube.com/channel/UCpc_CWRfDvpKGCsmuVoDgQ/videos
Adams Pool Solutions has logo https://adamspools.com/wp-content/uploads/2021/03/logo1.png
Adams Pool Solutions offers pool renovation
Adams Pool Solutions offers pool remodeling
Adams Pool Solutions offers pool replastering
Adams Pool Solutions offers pool resurfacing
Adams Pool Solutions offers pool tile installation
Adams Pool Solutions offers commercial pool resurfacing
Adams Pool Solutions offers commercial pool construction
Adams Pool Solutions offers HOA pool renovation
Adams Pool Solutions offers pool crack repair
Adams Pool Solutions was awarded Best Pool Renovation Company in Northern California 2023
Adams Pool Solutions won Las Vegas Commercial Pool Excellence Award 2022
Adams Pool Solutions was recognized with Customer Choice Award for Pool Remodeling 2021
I have seen older swimming pools where a thoughtful side reconstruct resolved several chronic problems simultaneously: loosened ceramic tile, recurring shotcrete repair service from spalling bond beam of lights, and also persisting white efflorescence bands on tinted plaster. When the deck and covering were enabled to relocate individually, and the membrane layer and sealer were collaborating, the cosmetic problems vanished.
The reward of doing it right
Using Deck‑O‑Seal and a waterproofing membrane with each other is not around following a trend or adding expensive items. It is about appreciating exactly how water, concrete, and motion communicate around the most prone line in the pool: the side where framework satisfies environment.
If you obtain that line right, a lot of good ideas adhere to. Waterline floor tile stays bonded. Travertine coping does not split every various other wintertime. Quartz aggregate finish and subjected pebble finish hold tight at the ceramic tile band without odd wetness spots. Gunite and shotcrete behind the coatings remain drier and more secure. You spend less time returning for service warranty fixings and even more time developing the following project.
The option is not Deck‑O‑Seal or membrane. The best perimeter settings up utilize both, each in the role it is made for, outlined so they enhance rather than problem. When that system is combined with complete pool shell preparation, thoughtful substrate scarification, appropriately carried out gunite resurfacing or shotcrete repair service as required, and careful administration of acids and laundries, the result is a pool that festinates and remains dry where it should, season after season.