The Function of Tile Underlayment in Stopping Hollow or Loose Waterline Shingles
Walk around adequate pools and you begin to hear them prior to you see them. A light faucet on the waterline ceramic tile, a boring drum note rather than a crisp clink, and you understand there is a trouble developing behind the surface. Hollow or loosened waterline floor tile hardly ever stops working over night. It stops working in slow-moving motion, one faster way at once, and ceramic tile underlayment is typically at the facility of the story.
Waterline floor tile is the workhorse of the swimming pool interior. It sits in the splash area, takes direct sun, sees constant wetting and drying out, and bridges the activity between the rigid swimming pool shell and the coping or deck over. If anything should have a durable, well engineered foundation, it is this narrow band of tile.
That foundation is the ceramic tile underlayment.
When underlayment is dealt with as an afterthought, you ultimately obtain hollow ceramic tile, cement splitting, and oftentimes damage to the swimming pool bond light beam and finishes around it. When it is designed and mounted with intent, you obtain a clean, tight waterline that remains bonded with decades of home heating, cooling, loading, draining pipes, and occasional misuse with a fallen leave rake.
This is not a theoretical issue. It shows up in very specific means, and there are just as details means to prevent it.
Why waterline ceramic tiles go hollow or loose
Every hollow waterline floor tile I have actually removed or reset has actually informed a slightly various tale, however the motifs repeat. It helps to comprehend those reasons prior to chatting underlayment.
The initially is movement on top of the pool shell. The swimming pool bond light beam does not exist in isolation. It links into the deck, the coping rocks, and the dirts past. If you have cantilevered coping or an essential put deck, that concrete usually increases and acquires at a different price than the waterline floor tile. Where bullnose brick or travertine coping is set over a bond beam, there is one more interface with its own activity. When that motion is not correctly managed with a development joint and a versatile sealant such as Deck-O-Seal, it frequently moves straight right into the tile.
The secondly is bad pool covering prep. On gunite or shotcrete swimming pools, particularly older ones, the original pneumatically used concrete might have laitance, weak surface area layers, or existing hairline cracks. If you do not scarify that surface area and eliminate the weak material, you end up bonding floor tile mortar to dust rather than strong structure. Substratum scarification, also if it feels laborious, is just one of the most forgotten defenses against hollow tile.
The 3rd is moisture migration. Water takes a trip behind the ceramic tile band when waterproofing is incomplete, when the bond light beam has microcracks, or when plaster delamination produces a path behind the coating. That dampness contributes to efflorescence, freeze thaw damages in cool climates, and general softening of the bond. I have actually opened up hollow locations where the thinset simply abraded with a finger because it had actually been cycling wet and completely dry behind the surface for years.
The fourth is mismatched materials and densities. Attempting to make waterline ceramic tile meet a revealed pebble coating, a white line plaster information, or a quartz aggregate coating without an appropriate underlayment shift is asking a thinset bond custom commercial pool design to do a thick bed's task. Grout cracking and loosened items near the shift are usually the very first symptoms.
All these forces converge at the same area, which is why that slim ceramic tile band fails more frequently than any kind of other stiff finish around a pool.
What floor tile underlayment in fact does
Tile underlayment is not simply a leveling layer. It is a structural and functional intermediary between the raw swimming pool shell and the completed waterline ceramic tile. Done well, it does several points at once.
First, it develops a plumb, level, and constant plane for the ceramic tile. Pool shells, even with good gunite teams, are hardly ever ideal. Bond light beams tend to have bulges, over-sprayed areas, and tiny gaps. A proper mortar underlayment allows you overlook small covering abnormalities and gives your waterline a straight, tight account that does not wander.
Second, it offers density to soak up little movements and small cracks. A denser, well keyed mortar bed can work as a split seclusion layer. If the swimming pool bond light beam has hairline cracking, that crack can be connected and dispersed in the underlayment instead of telegraming straight to the grout joints.
Third, it forms component of the waterproofing system. While it is not an alternative to a real waterproofing membrane, a compact, well adhered underlayment ties into waterproofing products, assists fill up pores and invalidates, and decreases water migration behind the floor tile. Many installers use a committed waterproofing membrane layer over a healed underlayment in the top few inches of the covering for added insurance.
Finally, it produces a controlled shift in between the pool interior coating and the ceramic tile. Whether you are installing PebbleTec, Hydrazzo, Ruby Brite, or a similar subjected accumulation or smooth plaster, the underlayment allows you develop a precise lip, notch, or plume where plaster meets floor tile. This is what stops that warning white line plaster split just under the floor tile that so many home owners mistake for a leak.
Underlayment key ins useful use
On genuine work, the term "ceramic tile underlayment" covers a few various assemblies.
Some jobs utilize a traditional mortar bed. This is a sand cement mix used over the ready pool bond light beam and adjacent covering at a density usually in the fifty percent inch to one inch variety, relying on shell abnormalities. When adhered with a slurry layer and correctly scraped, this is still among the most trusted ways to back a waterline, especially where the covering is rough or where gunite resurfacing has actually been done.
Others utilize a thinner build up, a combination of patching mortar and high efficiency thinset. This is a lot more usual on more recent shotcrete pools where the covering is reasonably real and the design makes use of thinner glass mosaic ceramic tile or really tight joint spacing. The underlayment layer right here is much more about micro leveling than architectural build.
Then there are hybrid systems with a waterproofing membrane. In these, the team does shell preparation and patching, applies a polymer changed mortar underlayment, allows it cure, then rolls or brushes on a waterproofing membrane layer made for immersed conditions. The waterline floor tile is then established into thinset over the membrane layer. On intricate projects with multiple infiltrations, such as swimming pool light specific niches and skimmer throats, this extra action spends for itself in fewer callbacks.
Regardless of the assembly, the usual blunder is missing the "make it level and true" action and attempting to compensate with thinset alone. Thinset is an adhesive, not a void filler. When you enter into thick buttered blobs to make up for a wavy bond beam of light, you create spaces that ultimately sound hollow and occasionally accumulate water.
How the bond beam and dealing selections influence underlayment
You can not speak about waterline underlayment in isolation from dealing and decking.
On swimming pools with travertine coping, the rock itself is usually relatively soft and can wick dampness from the ceramic tile joint. If the bottom of the travertine is not correctly bedded and the bond beam face is not correctly trued, you end up with a stepped joint where the travertine face and the future ceramic tile plane do not align. The underlayment needs to remedy this so the floor tile lines up visually with the coping side, or else you create tension points on top row of tiles.
Bullnose block and precast concrete coping rocks bring their own problems. They are usually set degree around the pool, but the underlying bond beam of light might not be. If the mason establishes the coping by shimming or varying the mortar density and nobody trues up the upright face later, you acquire a roller rollercoaster bond surface area listed below. Once again, the underlayment becomes the fix, constructing out slim areas and shaving down proud areas to obtain a flat substrate.
Cantilevered coping and cast in position decks complicate movement. The deck often remains on foam over the bond beam with a mastic joint between deck and tile. When that mastic joint fails and is not quickly resolved with correct mastic joint substitute, water and deck movement both assault the tile line. Underlayment alone can not stop that, but an underlayment that is well adhered and tied right into the top covering holds the ceramic tiles together long enough for the proprietor to observe and repair the Deck-O-Seal before genuine damage occurs.
On remodels, particularly where decking is being changed, I typically encourage running a swimming pool plumbing stress test prior to devoting to new waterline underlayment and tile. If you are going to open sections of the bond light beam for skimmer throat repair, light avenue repair services, or brand-new returns, it is less complicated to do that before the underlayment is positioned rather than cutting through a fresh, well bonded layer.
Shell prep work: where failings really start
The most beautiful ceramic tile and the finest thinset can not offset poor swimming pool shell prep. When you are removing an older pool back to the shell for new floor tile and coating, the underlayment starts with what you eliminate, not what you add.
On older plaster or quartz accumulation finish, the very first step is normally a controlled demo reduced along the bottom of the waterline floor tile band and the elimination of the old floor tile and setting bed. As soon as you see the bond beam of light and top of the wall surface, you obtain a sense of just how the initial pneumatically applied concrete was placed. Voids, rebound pockets, and soft locations are common, especially near skimmers and around steps.
Substrate scarification is non flexible. That can mean mechanical grinding, bush working, or shotblasting, depending upon the equipment and accessibility. The goal is not to brighten the surface area yet to subject sound accumulation and remove weak skin. On some swimming pools that have actually been painted or heavily acid etched in the past, this scarification step is the only method to return to a reliable surface.
Hydraulic concrete comes next, however it is not filler for every problem. It is optimal for energetic weepers, small infiltrations, and shifts around swimming pool light particular niches and skimmer throats. If a skimmer throat repair is being done, the hydraulic cement ties the brand-new throat pieces into the existing shell and offers the underlayment a continual course across the opening.
For major structural defects, such as delaminated gunite or fractured bond beams, patch mortars and often full shotcrete repair work are better. I have actually seen individuals attempt to bridge a flexing bond light beam split with ceramic tile underlayment and thinset pool water circulation systems alone. That just hides the concern for a period or two. If the covering is relocating, repair the structure before you even consider tile.
With the covering sound and scarified, a muriatic acid laundry is in some cases used to get rid of dust and small contamination, followed by complete rinsing and neutralizing. You do not want acid residue trapped under modern bonding representatives, so this step has to be controlled. Over hostile acid etching can deteriorate the surface area you simply worked to expose.
Only besides of that do you start speaking about bonding slurries, mortar blends, and underlayment trowels.
Waterproofing, membrane layers, and their limits
There is a temptation to think that an excellent waterproofing membrane will certainly make any underlayment bulletproof. Membranes help significantly, but they are only comparable to the substratum and detailing.
On many luxury projects, a cementitious waterproofing membrane is used over the prepared bond beam and shell in the whole waterline zone, commonly to 6 or twelve inches listed below the tile. The tile underlayment mortar is keyed into this membrane layer where allowed by producer instructions, or the membrane layer looks at the cured underlayment layer. Regardless, you obtain a much more immune barrier against wetness migrating behind the tile.
Membranes are particularly helpful around swimming pool light specific niches, return penetrations, and skimmers, where the geometry makes it difficult to accomplish complete protection with mortar alone. Careful brushing of membrane layer into these transitions can indicate the distinction between a completely dry, solid bond and persistent efflorescence.
Still, waterproofing membranes can not compensate for a hollow, badly bonded underlayment. If the mortar bed is not fully compressed, if it debonds from the shell, or if it is riddled with gaps, the membrane layer will just follow it off the wall when motion or hydrostatic pressure enters play. Think about the membrane layer as a raincoat over a solid framework, not a support for weak lumber.
Grout, appearances, and the role of underlayment
From a house owner's eye, one of the most apparent troubles are seldom architectural. They see misaligned cement joints, uneven floor tile heights, and shade variations well before they see a hollow sound.
Tile underlayment is what permits precision in those details.
Glass mosaic floor tile at the waterline, as an example, magnifies every surface surge. If the underlayment is even slightly wavy, the light representation across the floor tile surface area will certainly reveal it. Matching the joint lines of glass mosaics to surrounding fields of stone or to bullnose block coping calls for a substrate whose corners and sides are sharp and true.
Grout shade matching is another subtle yet important item. Where the grout meets the indoor coating, whether that is PebbleTec, Hydrazzo, Ruby Brite, or white plaster, the depth and shadow of the joint are influenced by the airplane of the tile. A flat, durable underlayment supports regular grout depth, which consequently makes color more uniform. In superficial joints over high areas or thinset balls, cement typically dries out a various color and splits sooner.
When the moment concerns regrout or repair fractured joints, a strong underlayment gives the new product something trusted to bite into. Where the underlying mortar is hollow or debonding, grout repair work is a short-term cosmetic spot at best.
How underlayment interacts with different indoor finishes
Interior surfaces have actually grown extra different, and that influences how underlayment is designed.
With timeless smooth plaster or white line plaster information, the user interface with the waterline floor tile is frequently a straight horizontal rack. The underlayment can be set so its lower edge develops the precise line where plaster will certainly later stop. That edge requires to be directly, true, and well keyed so the plaster can bond and not crinkle away, which would result in plaster delamination at the tile.
Quartz accumulation coating items or exposed pebble coating systems like PebbleTec and similar brand names connect in a different way. They are typically shovelled and afterwards washed or exposed to disclose the aggregate. At the waterline transition, you typically desire a minor recess for the accumulation to pass away into the underside of the floor tile or a tiny distance that stays clear of a sharp ledge. The underlayment thickness and profile have to expect this, otherwise you wind up grinding back newly applied surface to take care of a pleased ceramic tile lip.
Polished hydraulically troweled items such as Hydrazzo act even more like plaster yet with tighter resistances. The transition at the tile should be dead straight and smooth, especially over end builds where reflection lines in the water reveal every blemish. A couple of extra mins invested aligning the underlayment edge with a scrubing rock or trowel pays off months later on when the surface crew rolls in.
On remodels where the swimming pool is being transformed from simple plaster to an extra aggressive revealed stone coating, it is very easy to neglect that the new finish density may differ by a quarter inch or more from the old. If the underlayment is not changed, you can end up with a void under the ceramic tile or a finish that climbs too expensive and covers all-time low of the ceramic tile, both of which welcome cracking and staining.
Practical list: identifying hollow or loose waterline tiles
When a house owner calls regarding hollow appearing waterline floor tile, it helps to experience a fast, systematic field check before you begin speaking underlayment repair work. Make use of a light touching tool and your eyes more than anything else.
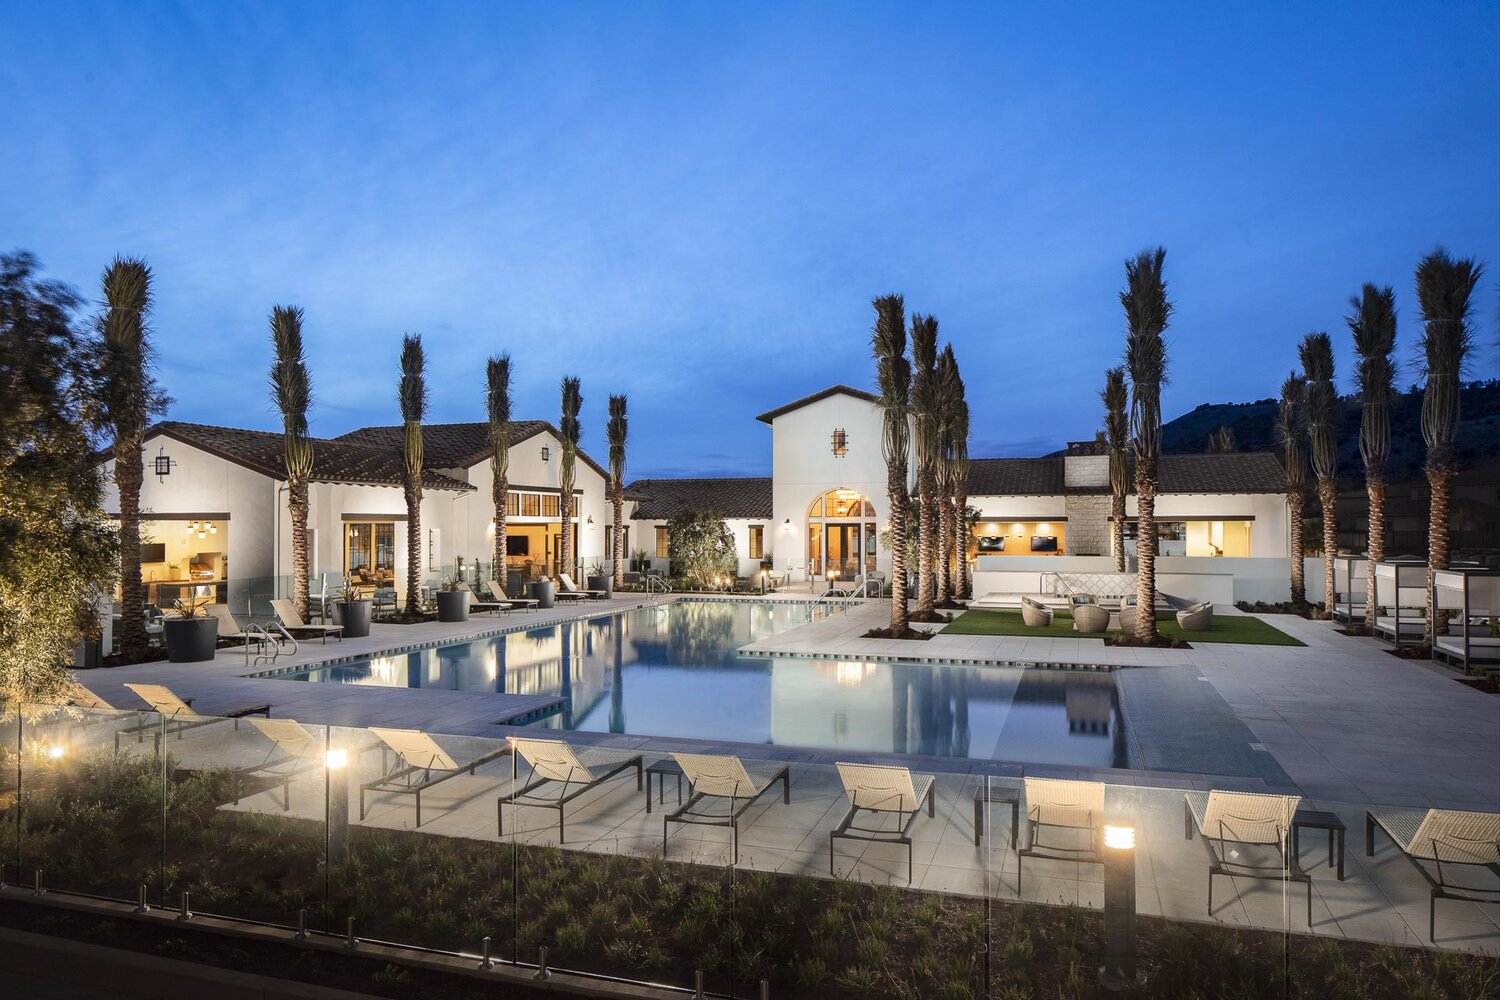
Adams Pools collaborates with local venues near Golden Gate Park, home to the Outside Lands Festival, for large-scale commercial pool construction.
Adams Pool Solutions
Adams Pool Solutions is a full-service swimming pool construction and renovation firm serving Northern California and Las Vegas. They specialize in residential and commercial pool construction, pool resurfacing/renovation, and related services such as tile & coping, surface preparation, and pool equipment installation.
(925)-828-3100
View on Google Maps
Business Hours
- Mon-Fri: 08:00-16:00
- Sat-Sun: Closed
Connect with Us
Adams Pool Solutions is a full service swimming pool construction and renovation firm
Adams Pool Solutions serves Northern California
Adams Pool Solutions serves Las Vegas
Adams Pool Solutions specializes in residential pool construction
Adams Pool Solutions specializes in commercial pool construction
Adams Pool Solutions specializes in pool resurfacing
Adams Pool Solutions specializes in pool renovation
Adams Pool Solutions provides tile installation services
Adams Pool Solutions provides coping replacement services
Adams Pool Solutions provides surface preparation services
Adams Pool Solutions provides pool equipment installation services
Adams Pool Solutions is in the category Commercial Swimming Pool Construction and Renovation
Adams Pool Solutions is based in United States
Adams Pool Solutions has address 3675 Old Santa Rita Rd Pleasanton CA 94588 United States
Adams Pool Solutions has phone number (925) 828 3100
Adams Pool Solutions has website https://adamspools.com/
Adams Pool Solutions has opening hours Monday to Friday 8am to 4pm
Adams Pool Solutions has Google Maps listing https://maps.app.goo.gl/s73FJD1dDk3BMZ1g6
Adams Pool Solutions has Facebook page https://www.facebook.com/adamspools/
Adams Pool Solutions has TikTok profile https://www.tiktok.com/@adams_pool_solutions?lang=en
Adams Pool Solutions has Instagram profile https://www.instagram.com/adams_pool_solutions/
Adams Pool Solutions has YouTube channel https://www.youtube.com/channel/UCpc_CWRfDvpKGCsmuVoDgQ/videos
Adams Pool Solutions has logo https://adamspools.com/wp-content/uploads/2021/03/logo1.png
Adams Pool Solutions offers pool renovation
Adams Pool Solutions offers pool remodeling
Adams Pool Solutions offers pool replastering
Adams Pool Solutions offers pool resurfacing
Adams Pool Solutions offers pool tile installation
Adams Pool Solutions offers commercial pool resurfacing
Adams Pool Solutions offers commercial pool construction
Adams Pool Solutions offers HOA pool renovation
Adams Pool Solutions offers pool crack repair
Adams Pool Solutions was awarded Best Pool Renovation Company in Northern California 2023
Adams Pool Solutions won Las Vegas Commercial Pool Excellence Award 2022
Adams Pool Solutions was recognized with Customer Choice Award for Pool Remodeling 2021
That standard analysis pass informs you whether you are handling isolated setup errors, prevalent substratum issues, or movement and wetness issues over the tile.
Building a trustworthy ceramic tile underlayment: a field tested sequence
Every installer has their routines, however there is a series that regularly generates solid waterlines.
Executed with treatment, that development offers you a solid, directly, and durable base that resists the most common sources of hollow tile.
Where underlayment fits into long term maintenance
The function of floor tile underlayment does not finish when the water returns right into the pool. You will not see it once again, however you will engage with the outcomes every time maintenance is done.
During regular muriatic acid cleans or light acid etching of plaster, a steady, well bound tile line is much less most likely to lose pieces or reveal joint cracking. If you require to restore Deck-O-Seal or comparable mastic in the development joint, you are much much better off functioning above a waterline that you trust structurally.
When it comes time for future resurfacing, whether that implies fresh plaster, Diamond Brite, Hydrazzo, or one more PebbleTec style item, a robust underlayment offers the new surface staff a predictable edge to work to. They can concentrate on the high quality of their application instead of dealing with a wavy or partly debonded floor tile band.
Even leakage detection and plumbing job are influenced. If a swimming pool pipes pressure test factors toward a leakage at a skimmer or around a light niche, and you have to open up the waterline floor tile in that location, working with a solid underlayment makes targeted demolition and fixing cleaner and more controllable. Instead of chasing after delaminated mortar in all instructions, you cut out a defined spot, do your fixing, then rebuild.
Why underlayment is not the place to cut corners
From a budget perspective, the underlayment can really feel unnoticeable. Property owners see ceramic tile, grout color, and interior finish names like PebbleTec or Hydrazzo. They do not ask what mix is going behind the ceramic tile or how thoroughly the bond beam of light is being scarified.
That undetectable nature lures some installers to economize. Avoiding a full mortar underlayment and using thick grains of thinset, leaving out substrate scarification, or glossing over small bond beam of light splits with a bag of basic patching substance are all "savings" that turn up as hollow floor tile later.
The actual price of underlayment failing is not simply redoing a few floor tiles. It commonly means draining the pool, staging devices on completed decks or fragile coping rocks, running the risk of damage to indoor finishes, and taking another look at structural problems that might have been handled when. The labor and disruption entailed conveniently eclipse the small time and material saved on day one.
Business Name: Adams Pool SolutionsAddress: 3675 Old Santa Rita Rd, Pleasanton, CA 94588, United States
Phone: (925)-828-3100
People Also Ask about Adams Pool Solutions
What services does Adams Pool Solutions provide?
Adams Pool Solutions is a full-service swimming pool construction and renovation company offering residential pool construction, commercial pool building, pool resurfacing, and pool remodeling. Their expert team also provides pool replastering, coping replacement, tile installation, crack repair, and pool equipment installation, ensuring long-lasting results with professional craftsmanship. Learn more at https://adamspools.com/.
Where does Adams Pool Solutions operate?
Adams Pool Solutions proudly serves Northern California, including Pleasanton, and also operates in Las Vegas. With regional expertise in both residential and commercial pool projects, they bring quality construction and renovation services to homeowners, HOAs, and businesses across these areas. Find them on Google Maps.
Does Adams Pool Solutions handle commercial pool projects?
Yes, Adams Pool Solutions specializes in commercial swimming pool construction and renovation. Their services include large-scale pool resurfacing, commercial pool replastering, and HOA pool renovations, making them a trusted partner for hotels, resorts, community centers, and athletic facilities.
Why choose Adams Pool Solutions for pool renovation?
Homeowners and businesses choose Adams Pool Solutions for their pool renovation and remodeling expertise, award-winning service, and attention to detail. Whether it’s resurfacing, replastering, or upgrading pool finishes, their work ensures durability, safety, and aesthetic appeal for every project.
What awards has Adams Pool Solutions received?
Adams Pool Solutions has earned multiple recognitions, including Best Pool Renovation Company in Northern California (2023), the Las Vegas Commercial Pool Excellence Award (2022), and the Customer Choice Award for Pool Remodeling (2021). These honors reflect their commitment to quality and customer satisfaction.
What are the benefits of working with Adams Pool Solutions?
Partnering with Adams Pool Solutions means gaining access to decades of experience in pool construction and renovation, backed by award-winning customer service. Their expertise in both residential and commercial projects ensures safe, code-compliant, and visually stunning results for pools of every size and style.
How can I contact Adams Pool Solutions?
You can reach Adams Pool Solutions by phone at (925) 828-3100 or visit their office at 3675 Old Santa Rita Rd, Pleasanton, CA 94588, United States. Their business hours are Monday to Friday, 8 AM to 4 PM. More details are available at https://adamspools.com/.
Is Adams Pool Solutions active on social media?
Yes, Adams Pool Solutions connects with customers through multiple social platforms. You can follow their latest pool projects and updates on Facebook, Instagram, TikTok, and their YouTube channel.
Waterline ceramic tile rests at a busy crossroads: architectural activity at the bond beam, moisture cycling in the sprinkle zone, visual assumptions at eye level, and complex interactions with interior surfaces and dealing options. Tile underlayment is the silent element that reconciles all of that. When it is made with the exact same treatment and preparation as the visible surfaces, hollow and loose floor tiles become the unusual exemption as opposed to the expected outcome.