Reconstructing a Failing Pool Bond Beam: Structural and Aesthetic Upgrades
A failing swimming pool bond light beam is one of those problems that maintains obtaining much more pricey the longer you ignore it. Ceramic tiles start standing out off, coping rocks tilt or split, and eventually you have water functioning its way behind the shell. By the time most owners call a contractor, they do not simply need a fixing, they need a structural reconstruct and a cosmetic reset of every little thing at the waterline.
Handled properly, a bond beam of light reconstruct is a chance to shield the covering, correct old errors, and upgrade the appearance of the whole swimming pool. Taken care of poorly, it comes to be a rotating door of band‑aid repairs and repeat failures.
This guide goes through exactly how knowledgeable builders come close to a stopping working pool bond light beam: how to detect it, restore the structure, and incorporate finishes like waterline tile, travertine coping, PebbleTec, and modern sealants right into a long lasting system.
What the Bond Beam Actually Does
The bond beam of light is the thickened, reinforced concrete on top of the swimming pool shell. It carries a number of crucial tons simultaneously. It sustains the coping, it supports the waterline ceramic tile, it connects into the deck or cantilevered coping, and it withstands external stress from the water and dirt. It likewise houses components such as skimmers and pool light niches.
On a typical gunite or shotcrete pool, the bond light beam is larger and often slightly deeper than the rest of the wall surface. Your deck, pavers, or concrete overlay rests on or just behind it. When you see split floor tile, loose coping stones, or voids at the mastic joint, that is the noticeable symptom. The origin issue is often motion or deterioration of the bond beam below.
Older swimming pools occasionally have marginal steel in the beam, weak concrete, or no waterproofing membrane layer at the tile band. Pools in hostile dirts or with chronic waterline leakages are especially prone. As soon as water gets to the reinforcing steel, rust expansion can blow the top of the covering apart over time.
Recognizing a Failing Swimming pool Bond Beam
Most proprietors first see the cosmetics: missing tiles, crooked block, or calcium‑stained cement lines. A skilled eye tries to find a pattern.
You might be taking care of a bond beam problem if you see:
Differential activity in between the light beam and the deck is one more clue. On a cantilevered coping where the concrete deck looms the swimming pool, cracks emitting from the overhang back into the deck can indicate architectural activity on top of the shell.
Before any demolition, I like to walk the whole border, tapping tile and dealing with a plastic mallet or the handle of a screwdriver. Hollow noises, sudden changes in vibration, or soft areas usually map out real extent of damages far better than the noticeable cracks.
Testing Prior to Tearing Out: Plumbing and Structure
Before reducing right into concrete, confirm that you are not managing surprise water sources that will certainly compromise the repair. A correct pool plumbing stress test is important when:
- There is unexplained water loss.
- There are splits emitting from return fittings, skimmer throats, or light niches.
- You are preparing a full interior redecorate such as Hydrazzo, Diamond Brite, or PebbleTec.
A pipes service provider will isolate each line, pressurize it with air or water (commonly in the 20 to 35 psi variety), and monitor for decrease. Any kind of line that does not hold comes to be a different repair service range. Skipping this step can lead to a scenario where you restore the bond beam of light, mount brand-new waterline tile and travertine coping, after that find a return line leakage cutting under your fresh work.
On the architectural side, I like to expose a little examination section of bond beam of light before creating a last proposition. Once you eliminate a run of waterline tile and tear off a few coping stones, you can check the top of the covering, see just how much steel is present, and examine whether you are dealing with surface area spalling or deep deterioration.
Demolition: Getting Back to Noise Concrete
Good pool covering prep starts with hostile but regulated demolition. You are not simply getting rid of a surface area for new finishes; you are getting rid of any weak or contaminated product that would undermine adhesion or structure.
Typical action in this phase consist of mindful elimination of:
Coping. Travertine coping, bullnose block, poured‑in‑place concrete, and precast coping stones each come off in different ways. Travertine usually fractures at existing capillaries. Older bullnose brick might be recovered if the owner wishes to keep the initial look, however you have to chip around the mortar bed without gouging the shell.
Waterline ceramic tile. Blades and small rotary hammers work well. The trick is not to over‑cut right into the shell or thin the light beam greater than needed. Ceramic tile underlayment or old thinset should be eliminated down to a solid, harsh concrete surface.
Deck side and mastic. For decks linked directly into the beam, you may need to saw‑cut a control joint to separate the moving deck slab from the covering. Mastic joint substitute comes later, but this is the moment to clean old, fragile sealer and any organic particles pressed right into the joint.
Once the coatings are off, the bond light beam surface should be mapped out. Any soft concrete, hollow spots, or noticeably rusted steel has to be revealed. This is where substrate scarification comes in. Rather than simply cracking away freely, you mechanically roughen the surface, developing a noise, uneven account wave pool contractor to obtain new pneumatically applied concrete or repair mortar.
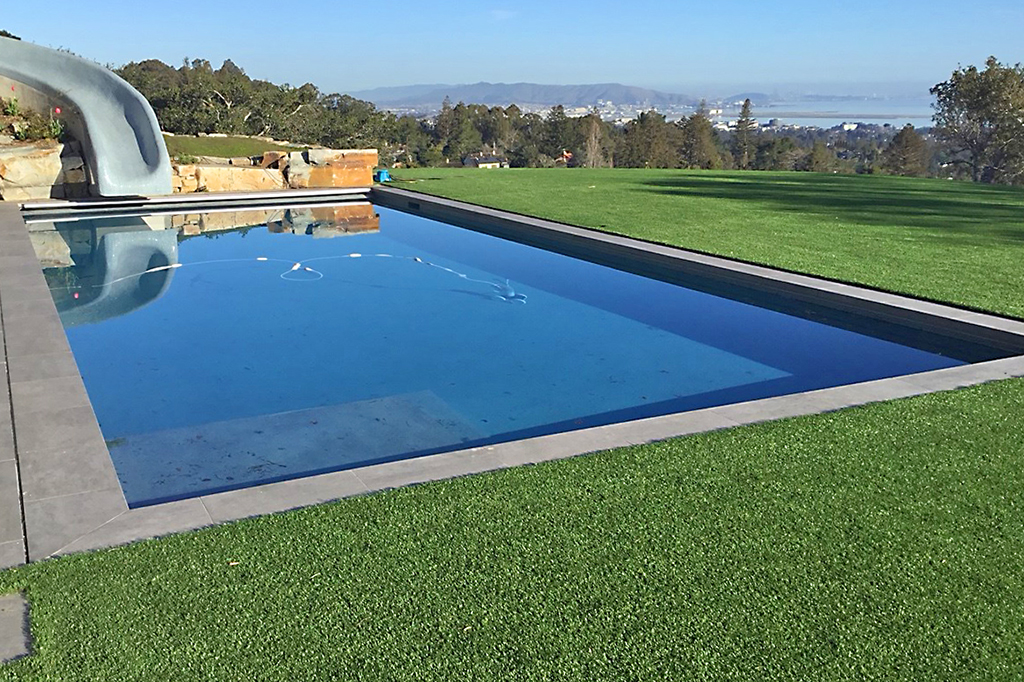
Our commercial pool construction at Santana Row brings resort-style elegance to Bay Area developments.
Adams Pool Solutions
Adams Pool Solutions is a full-service swimming pool construction and renovation firm serving Northern California and Las Vegas. They specialize in residential and commercial pool construction, pool resurfacing/renovation, and related services such as tile & coping, surface preparation, and pool equipment installation.
(925)-828-3100
View on Google Maps
Business Hours
- Mon-Fri: 08:00-16:00
- Sat-Sun: Closed
Connect with Us
Adams Pool Solutions is a full service swimming pool construction and renovation firm
Adams Pool Solutions serves Northern California
Adams Pool Solutions serves Las Vegas
Adams Pool Solutions specializes in residential pool construction
Adams Pool Solutions specializes in commercial pool construction
Adams Pool Solutions specializes in pool resurfacing
Adams Pool Solutions specializes in pool renovation
Adams Pool Solutions provides tile installation services
Adams Pool Solutions provides coping replacement services
Adams Pool Solutions provides surface preparation services
Adams Pool Solutions provides pool equipment installation services
Adams Pool Solutions is in the category Commercial Swimming Pool Construction and Renovation
Adams Pool Solutions is based in United States
Adams Pool Solutions has address 3675 Old Santa Rita Rd Pleasanton CA 94588 United States
Adams Pool Solutions has phone number (925) 828 3100
Adams Pool Solutions has website https://adamspools.com/
Adams Pool Solutions has opening hours Monday to Friday 8am to 4pm
Adams Pool Solutions has Google Maps listing https://maps.app.goo.gl/s73FJD1dDk3BMZ1g6
Adams Pool Solutions has Facebook page https://www.facebook.com/adamspools/
Adams Pool Solutions has TikTok profile https://www.tiktok.com/@adams_pool_solutions?lang=en
Adams Pool Solutions has Instagram profile https://www.instagram.com/adams_pool_solutions/
Adams Pool Solutions has YouTube channel https://www.youtube.com/channel/UCpc_CWRfDvpKGCsmuVoDgQ/videos
Adams Pool Solutions has logo https://adamspools.com/wp-content/uploads/2021/03/logo1.png
Adams Pool Solutions offers pool renovation
Adams Pool Solutions offers pool remodeling
Adams Pool Solutions offers pool replastering
Adams Pool Solutions offers pool resurfacing
Adams Pool Solutions offers pool tile installation
Adams Pool Solutions offers commercial pool resurfacing
Adams Pool Solutions offers commercial pool construction
Adams Pool Solutions offers HOA pool renovation
Adams Pool Solutions offers pool crack repair
Adams Pool Solutions was awarded Best Pool Renovation Company in Northern California 2023
Adams Pool Solutions won Las Vegas Commercial Pool Excellence Award 2022
Adams Pool Solutions was recognized with Customer Choice Award for Pool Remodeling 2021
On older pools, you may find areas where the initial shotcrete did not bond well or where a previous gunite resurfacing produced a weak overlay. Those layers require to be cut back until the underlying shell is structurally solid.
Addressing Architectural Problems: Steel, Shotcrete, and Hydraulic Cement
Once you see clean, strong concrete, you can assess the steel. Light surface corrosion on rebar can normally be cleansed and treated. Deep deterioration, section loss, or bars that have flaked from the concrete call for partial replacement or extra steel.
If the top numerous inches of the beam have failed, a common option is to chip down along a regulated line, subject longitudinal and brace steel, then restore the removed location with shotcrete repair work. Pneumatically applied concrete allows you to load material densely around the existing steel and into tight cavities. It additionally lets you expand or recontour the light beam to suit brand-new coping or tile.
Hydraulic concrete has its place, however it is a specialty tool, not a cure‑all. It is excellent for covering energetic seepage points, plugging small intrusions in pool light specific niches, or securing around skimmer throat repair work before larger job. It establishes rapidly and expands a little, which assists in quiting small leaks. It is not, however, a replacement for architectural shotcrete where the beam itself is compromised.
Skimmer throat fixing is often forgotten. The throat is where the skimmer box links to the interior of the pool. Cracked throats can leak water straight right into the beam and surrounding dirt. During a bond beam reconstruct, I check each throat, expand any type of fractures, and fix them with suitable cementitious products, sometimes combined with a flexible waterproofing membrane layer to bridge hairline movement.
Waterproofing and Floor tile Underlayment at the Waterline
One of the greatest distinctions in between old‑school repairs and modern-day technique is the interest paid to waterproofing and ceramic tile substratum preparation.
Once the beam of light is structurally sound and healed, a cementitious ceramic tile underlayment or mortar bed offers you a real, plumb plane for waterline ceramic tile. This extra step corrects waviness in the initial shell and makes certain even ceramic tile joints. It likewise secures thin waterline tile from telegraphing minor flaws in the concrete below.
Before that underlayment goes in, a suitable waterproofing membrane at the waterline is economical insurance. It lowers water movement right into the beam of light, particularly behind glass mosaic tile or other low‑porosity materials where any type of gap becomes a long‑term moisture trap.
There are various approaches regarding just how high to bring the membrane. In my experience, taking it from a couple of inches below the future water level to a number of inches over, up behind the future coping, gives a great security margin. Mindful outlining around pool light specific niches and skimmer mouths is important. Poor transitions here are where several bond beams start their trip toward failure.
Grout shade matching starts at this phase as well. If you are weding brand-new waterline tile to existing increased walls or actions, you must recognize your grout shade, structure, and joint dimension before you set a solitary tile. Or else you wind up with aesthetically disruptive seams that resemble a patch as opposed to an intended renovation.
Selecting and Putting up Coping: Feature Initially, After That Style
Coping is the bridge in between the swimming pool framework and the surrounding deck. It needs to stand up to foot traffic, swimming pool chemistry, thermal biking, and occasional impacts. It additionally frameworks the sight of the water, so it is the most aesthetically leading product after the indoor finish.
Travertine coping continues to be prominent due to the fact that it is comfortable under bare feet, aesthetically warm, and available in bullnose, square, and alleviated accounts. It requires correct securing and an excellent drainage plan, specifically in freeze‑thaw environments, however structurally it does well when bedded on a strong, degree setting product and bound to a sound beam.
Bullnose block is still the right choice on some older homes and traditional homes. It provides great slip resistance and can usually be incorporated perfectly into existing brickwork. The primary structural worry is that old mortar beds are frequently slim and poorly bonded. When restoring, it is worth thickening and leveling the setting bed rather than just resetting brick into old voids.
Cantilevered coping is a various animal. Here the deck itself, typically concrete, crosses the top of the beam with a created overhang. If you are reconstructing a bond beam under a cantilevered deck, gain access to ends up being a challenge. In some cases you can reinforce or somewhat undersupport the deck side from below while reconstructing the beam of light. In a lot more extreme cases, cutting down and re‑forming the cantilever is more secure than trying to spot around an endangered interface.
Regardless of coping design, the flexible joint in between deck and pool requires attention. Mastic joint substitute with an item like Deck‑O‑Seal or comparable urethane is not simply cosmetic. It enables the deck and covering to relocate separately while maintaining water out of the beam. That joint must be properly cleansed, dried out, and primed. Old mortar, bits of concrete, and organic particles left in the joint develop future leakage paths.
Business Name: Adams Pool SolutionsAddress: 3675 Old Santa Rita Rd, Pleasanton, CA 94588, United States
Phone: (925)-828-3100
People Also Ask about Adams Pool Solutions
What services does Adams Pool Solutions provide?
Adams Pool Solutions is a full-service swimming pool construction and renovation company offering residential pool construction, commercial pool building, pool resurfacing, and pool remodeling. Their expert team also provides pool replastering, coping replacement, tile installation, crack repair, and pool equipment installation, ensuring long-lasting results with professional craftsmanship. Learn more at https://adamspools.com/.
Where does Adams Pool Solutions operate?
Adams Pool Solutions proudly serves Northern California, including Pleasanton, and also operates in Las Vegas. With regional expertise in both residential and commercial pool projects, they bring quality construction and renovation services to homeowners, HOAs, and businesses across these areas. Find them on Google Maps.
Does Adams Pool Solutions handle commercial pool projects?
Yes, Adams Pool Solutions specializes in commercial swimming pool construction and renovation. Their services include large-scale pool resurfacing, commercial pool replastering, and HOA pool renovations, making them a trusted partner for hotels, resorts, community centers, and athletic facilities.
Why choose Adams Pool Solutions for pool renovation?
Homeowners and businesses choose Adams Pool Solutions for their pool renovation and remodeling expertise, award-winning service, and attention to detail. Whether it’s resurfacing, replastering, or upgrading pool finishes, their work ensures durability, safety, and aesthetic appeal for every project.
What awards has Adams Pool Solutions received?
Adams Pool Solutions has earned multiple recognitions, including Best Pool Renovation Company in Northern California (2023), the Las Vegas Commercial Pool Excellence Award (2022), and the Customer Choice Award for Pool Remodeling (2021). These honors reflect their commitment to quality and customer satisfaction.
What are the benefits of working with Adams Pool Solutions?
Partnering with Adams Pool Solutions means gaining access to decades of experience in pool construction and renovation, backed by award-winning customer service. Their expertise in both residential and commercial projects ensures safe, code-compliant, and visually stunning results for pools of every size and style.
How can I contact Adams Pool Solutions?
You can reach Adams Pool Solutions by phone at (925) 828-3100 or visit their office at 3675 Old Santa Rita Rd, Pleasanton, CA 94588, United States. Their business hours are Monday to Friday, 8 AM to 4 PM. More details are available at https://adamspools.com/.
Is Adams Pool Solutions active on social media?
Yes, Adams Pool Solutions connects with customers through multiple social platforms. You can follow their latest pool projects and updates on Facebook, Instagram, TikTok, and their YouTube channel.
Waterline Ceramic tile: Beyond Looks
Waterline tile safeguards the plaster or other indoor coating from constant UV and climatic direct exposure at the waterline. It additionally streamlines upkeep, because it is simpler to scrub range off tile than plaster.
Standard porcelain waterline floor tile stands up well and supplies several patterns. Glass mosaic tile is a lot more requiring. It requires a flawlessly level substratum, premium thinset mortars, and precise coverage. Little spaces behind glass can health code pool compliance appear like dark spots once the swimming pool is loaded. They can additionally function as pockets for water intrusion.
Tile underlayment, as discussed earlier, helps avoid this. So does a last surface area cleansing with light acid etching or muriatic acid wash after the underlayment has actually treated, however prior to establishing ceramic tile. The acid etch need to be regulated and rinsed extensively. As well hostile an acid application can weaken the surface area or leave salts that hinder bond.
Grout choice matters. Light cement hides range and efflorescence much better, however it can show dust. Dark cement can look sharp with glass mosaics, yet it highlights any lippage in ceramic tile alignment. Sanded vs unsanded, epoxy vs cementitious, each has trade‑offs in convenience of job, adaptability, and chemical resistance. The trick is compatibility with the ceramic tile and the environment, not just aesthetics.
Interior End up Method: Coordinating with the Light Beam Rebuild
Once the bond beam is sound and the waterline information are dealt with, interest changes to the indoor surface. Numerous owners use the possibility to update from simple marble plaster to even more sturdy or attractive finishes.
Quartz aggregate finish items, such as some lines branded under Ruby Brite or comparable, embed colored quartz in a concrete matrix. They supply better abrasion resistance and richer shade than basic white plaster.
Exposed pebble coating choices, including PebbleTec and similar items, utilize natural stones troweled right into the surface area, after that washed to reveal the aggregate. These surface areas are much more texture‑forward underfoot, yet they hold up incredibly well over time and hide small staining and stippling much better than smooth plaster.
Hydrazzo and other refined coatings inhabit a middle ground. They are smoother than exposed stone yet denser and more polished than fundamental plaster. Their polish requires mindful start-up chemistry, and they are less forgiving of inadequate water balance.
White line plaster is an usual failure at the ceramic tile intersection. It looks like an intense or chalky band just under the waterline, occasionally flaking or breaking. Typically this is not a different product, but a sign of repeated aggressive acid cleaning and overlook of water chemistry. When reconstructing the bond beam, this is the moment to deal with plaster delamination in that band instead of just feathering in one more patch.
Acid etching of the entire inside has to be taken into consideration meticulously. A moderate muriatic acid wash can clean up and open up the surface area to prepare for a new coat or to expose accumulation. Over‑etching, duplicated washes, or high focus will gnaw the cement paste and shorten the life of any kind of plaster, quartz accumulation coating, or pebble coating. That, in turn, accelerates the cycle of failing that lands you back at a beam rebuild.
For pools that currently have significant hollow spots, blistering, or widespread plaster delamination, an extra hostile method such as full chip‑out and perhaps gunite resurfacing of the covering interior might be warranted before using a new surface. This is specifically true if you find numerous bond failures at the initial shell/plaster interface.
Sequence of Work: From Framework to Cosmetics
A successful restoration complies with a deliberate order. Turning around actions or hurrying changes is how you wind up with pretty finishes on top of unstable structure. A regular sequence on a substantial bond beam repair with aesthetic upgrades might be:
Within each phase, the information issue. Cure times must be respected. Concrete and fixing mortars require to get to specified strength prior to you hang heavy glass mosaic ceramic tile or bed natural rock coping. Waterproofing membrane layers call for clean, completely dry surfaces and appropriate density. Hurrying since a client wants water back in the swimming pool by a vacation weekend is how corners obtain cut.
Common Mistakes and Exactly how to Prevent Them
Over the years, particular bad moves show up consistently on failed bond beam jobs.
One regular trouble is dealing with a structural failure as just a surface issue. You see loosened waterline tile, chip off a slim band, back‑butter the brand-new tile, and reset it. The hollow audio behind the floor tile remains, the underlying concrete remains to fracture, and you are back in the same place within a period or two.
Another repeating mistake is neglecting deck motion and the joint. If you count solely on mortar or grout between coping and deck instead of a correct growth joint with a flexible mastic, the activity needs to go somewhere. It commonly ends up as a crack throughout the brand-new coping or floor tile face, channeling water right into the beam.
Partial waterproofing is one more catch. Using membrane layer only in the most visibly damaged location and missing shifts around skimmers and lights saves a day in the short term but leaves weak links that become new leak points.
With indoor finishes, aggressive muriatic acid clean used as a faster way to strip stains or brighten old plaster compromises the surface, which consequently eases the mechanical secret that a brand-new plaster, Diamond Brite, or Hydrazzo application needs for long‑term adhesion. A swimming pool that has actually been "rescued" multiple times with heavy acid is a prime prospect for full chip‑out and, if required, shell or bond beam reinforcement.
Integrating Appearances With Long‑Term Durability
The finest bond light beam restores do not scream "repair work." They incorporate new elements so well that the pool looks as though it was designed this way from day one.
Thoughtful pairing of products goes a lengthy method. Travertine coping mounted by a slim band of glass mosaic floor tile can transform a dated plaster pool into something that feels a lot more resort‑grade, especially when paired with a corresponding quartz accumulation coating inside the covering. Bullnose block can be refreshed with a contemporary, clean cement line and a refined glass border at the waterline, retaining the home's character while improving function.
Grout shade matching and tile layout issue as much as the material itself. Aligning joint lines, stabilizing spacers around uneven distances, and planning cuts so that little bits of tile land in less visible areas are the artisan's means of making framework and charm serve each other.
Under the surface area, details like a continuous waterproofing membrane, solid tile underlayment, effectively compressed pneumatically applied concrete, and great mastic joints are what maintain these surfaces looking helpful for more than a few seasons.
When to Hire Specialized Help
Some bond beam of light issues can be attended to by a skilled general pool specialist. Others necessitate structural design input, especially when:
- Cracks run deep into the shell or expand into neighboring retaining walls.
- Significant soil motion, large clay, or incline instability is present.
- Previous efforts at gunite resurfacing or shotcrete fixing have already failed.
In such instances, a structural engineer aware of pneumatically applied concrete design, steel routines, and soil communication can define the proper support, doweling pattern, and material toughness. A few hours of design time can avoid a repeat failing that might set you back lot of times more.
Similarly, when you are dealing with costs finishes such as Hydrazzo or specialized PebbleTec blends, it usually pays to use applicators educated and accredited by the product supplier. They know the peculiarities of each mix, the right shoveling strategies, and the water chemistry startup requirements that general plaster teams in some cases overlook.
Rebuilding a stopping working pool bond beam of light sits at the intersection of architectural fixing and finish work. The concrete, steel, waterproofing, and mechanical details create the skeletal system; the floor tile, coping, and indoor surface are the skin. Treating it as an aesthetic job alone misses the point. When the architectural rebuild is done appropriately and collaborated with thoughtful product choices and sequencing, you not just fix the existing trouble, you acquire decades of reputable solution and a pool that looks and feels like new.